Welcome to our website !
Frikadeller smørrebrød - the perfect way of dispatching those leftovers!
Frikadeller are Danish meatballs and are commonly eaten as part of the evening meal, and served perhaps with boiled potatoes. They are also great placed either warm or cold atop smørrebrød. Flavourful and oh so light, there are as many frikadeller recipes in Denmark as their are households - and these treasured family secrets are passed on from one generation to the next. But, in fact, there is only one true frikadeller recipe - the one recipe to rule them all - and it is guarded deep inside the most secure vault in all of the Kingdom of Denmark.

The recipe itself for frikadeller is written in the original manuscript of THE definitive guide to Danish cuisine - Frøken Jensens Kogebog - handwritten by the venerable lady of the Danish kitchen herself in 1901. It is also said that the original copy of the unabridged handwritten manuscript (not the commonly published concise edition you can still find in stores today) lists and details the twenty-five "official"smørrebrød - if it is not in the original Frøken Jensens Kogbog, then it is not really smørrebrød. And while I have not seen it with my own eyes, the ancient tome purportedly contains an even lengthier list of things one must not combine together when making danish open-faced sandwiches (ham, blue cheese and pickled herring anybody? Frøken Jensen said "Nej!").

Secret location of frikadeller recipe...
While it is a closely guarded national secret, I can reveal to you here that the vault's location is actually in central Copenhagen, deep inside the basement of the beautiful Rosenborg Castle. The vault uses the most advanced anti-theft technology to ensure that Denmark's greatest treasures are kept safe and sound. Not coincidentally, this vault is also home to other precious national treasures, such as the crown jewels of the Danish royal family, which are on display behind thick bulletproof glass out of the reach of tourists and robbers alike. Hundreds of sensors are constantly vigilant for the slightest sign of trouble, and at the slightest whiff of risk, the ultra-secure environment shuts down tighter than Fort Knox - with 8 inch thick steel doors slamming shut in an instant - entrapping anybody caught inside the vault - long before escape is possible.

The frikadeller recipe is a closely guarded secret!
Ok, ok! So none of this is true about the secret location of the frikadeller recipe, the official smørrebrød list, or even the handwritten Frikadeller recipe, but Rosenborg Castle is real, it is highly secure, and it is in Copenhagen. As a child, my imagination was captivated by the seemingly impenetrable safe, and I assumed that it housed secrets even more wonderful than the priceless treasures actually on display - treasures like the secrets of smørrebrød.

Rosenborg Castle in Copenhagen
Rosenborg Castle was built in the Dutch Renaissance style in 1606 and was used as a summer residence by King Christian IV as well as other Danish kings. Today, the castle serves as a museum, with many interesting historical artefacts on display including the original crown from the coronation of King Christian IV himself in 1596. Find out more about the Rosenborg Castle museum here.

All this is very interesting, but I am sure that by now you are dying to know how to make frikadeller! So enough of the suspense - here is what you need to know:

Use good meat and grind it yourself
To begin with, frikadeller can be made from different types of ground meat including beef, veal, and pork. I believe the best frikadeller have at least 50% pork, and to ensure the tastiest meat balls, you should use the best possible lean meat you can buy - for instance pork loin, veal cutlets, and so on. This means you'll have to grind the meat yourself (or ask the butcher to do it for you), since typical store ground meats are very high in unnecessary fat. You will find the recipe for frikadeller below.

In terms of using frikadeller for smørrebrød, this is very common in Denmark as a way of using up leftovers from the previous night's dinner, and there are actually a few different accompaniments that you can use
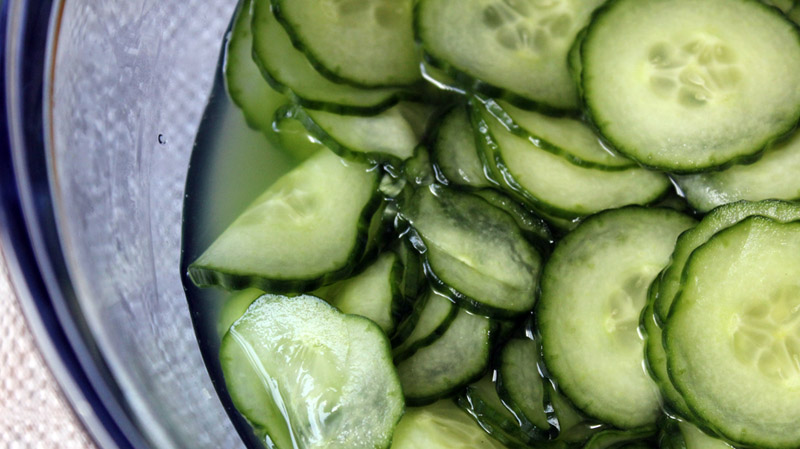
 - agurkesalat, rødkÃ¥l, asier and even pickled red beets - all of these sweet and sour toppings compliment the light, savory flavour of meat balls when eaten on top of buttered Danish rye bread.

Variety is the spice of life!
Ingredients for making frikadeller:

Grind pork, veal and onion
together a few times

  • 250 grams of finely ground pork
  • 250 grams of finely ground veal
  • 1 medium onion, ground finely along with the meat
  • 1 large egg
  • 350 ml soda water
  • 1 tsp salt
  • 3 tbsp flour (rye or wheat)
  • a pinch or two of ground all-spice
  • freshly ground pepper to taste
  • Butter for frying
Instructions

1) Combine all the ingredients (except the butter) in a bowl. The mixture should be quite moist and soft.

Frikadeller ingredients - ready to mix!
Mixture too soft to handle
2) Place a non-stick frying pan over medium-high heat, and then melt a couple of table spoons of butter in the frying pan. You will be frying the meatballs in batches.

3) Using a pair of spoons, form the meatballs and place them, one-by-one, in the hot frying pan. Don't put too many frikadeller in the pan at once, or they will boil instead of fry! The frikadeller should not be touching.

Form frikadeller with a couple of spoons 
4) Cook the meatballs for about 3 minutes, and then flip gently (I use a couple of knives for this manoeuvre).  

Fried in batches - don't add too many to the pan at once!
5) Cook for 3 minutes more and then remove the frikadeller to a separate platter. Add more butter and then fry another batch.

6) Once you are  ready for smørrebrød, butter a pice of dark Danish rye bread, slather it with Dijon mustard, place a couple of sliced meatballs on the mustard, and then top it with an appropriate pÃ¥læg (for instance, agurkesalat or even dill pickles). Make sure you enjoy with a cold lager beer and a fork & knife.


Chocolate smørrebrød anyone?
Everybody loves chocolate, right? And the Danes are no different. In fact, they love chocolate so much they eat it on open-faced sandwiches...for breakfast! Admittedly, it' mostly a thing kids do, but if you ever feel like indulging your inner Danish child, butter up a slice of Danish rye and eat it topped with a couple of thin slices of chocolate, and then go crazy!

Chocolate pålæg sent via airmail
Get this. In Danish supermarkets you can buy chocolate slices specially prepared for the purpose of placing atop bread! It is available in either a milk or a dark variety, comes thinly sliced, and is cut to fit perfectly on a half a piece of Danish rye bread. But don't worry, you can enjoy your chocolate slices on pretty much any kind of bread for that matter. This isn't exactly gourmet cuisine, so you can get away with murder here. Toasted english muffins, baguette, melba toast, heck croutons! Whatever makes you happy.

Homemade chocolate slices
But what if you are not in Denmark and want to treat yourself to a little slice of chocolatey breakfast heaven? Short of asking an uncle to send you a few packages in the mail (which is what I do), what are your options? Ah, worry not! You can make prepared chocolate slices yourself. All you need is some chocolate, a thermometer, and the technique I will describe in a moment. But first, I need to digress slightly...

All this talk of chocolate makes me want a cup of coffee. I, like many canadians of Danish origin, drink copious amounts of coffee (see per capita consumption data here for the main coffee drinking nations). And while there are many ways of preparing coffee - most of which I enjoy - I really enjoy coffee made using a Bodum coffee press. If you like coffee and haven't experienced this manner of preparing coffee, you have to check it out. And another thing, since the Bodum system doesn't keep coffee warm, many Danes also have a coffee thermos. I love these. They add a real "je ne sais quoi" - or a "det ved jeg ikke" as they (do not) say in Danish - to the morning breakfast table. Check out the classic Stelton thermos for a touch of retro Danish style.   

Bodum - Danish for great coffee...
   
Stelton: Great for keeping coffee warm!

   
Tempering Chocolate

Ok, now back to making your own chocolate slices for Chocolate open-faced sandwiches. The trick is to use tempered chocolate - chocolate that has been melted, cooled to a specific temperature and then heated slightly. This results in a chocolate that sets firmly and maintains a nice glossy sheen - just what you want when enjoying your morning breakfast! And it doesn't melt all over your fingers the second you touch it. Here is how to temper your chocolate and make pålæg:

  • Things you will need: You will need an accurate chocolate thermometer for tempering chocolate and a non-stick, heat resistant surface to work on (I like silpat silicone mats for this).

  • Ingredients: Start with about 500g semi-sweet bakers chocolate. If you are using chunks, you'll need to chop them up into small pieces. You call also use chocolate chips - but use dark chocolate. Milk chocolate can also be tempered, but requires a slightly different procedure (the temperatures are different). 
  • Getting ready: Prepare a small double boiler by placing one small pot in another pot containing water, heat the water until it starts to boil, then reduce heat to a gentle simmer.
  • Heating: Place about 2/3 of the chocolate into the double boiler and melt it until it reaches 45-47 degrees Celsius. You can go hotter, but then cooling takes longer.

Melt chocolate in a double boiler
  • Cooling: Remove the chocolate from the hot water, and, bit by bit, stir the unmelted chocolate into the melted stuff until you reach 26-27 C. Adding unmelted chocolate helps cool the whole thing faster.  

  • Heating again: Put the pot containing the chocolate back into the hot water and stir for about 30 seconds until the temperature reaches 32 C. Your chocolate is now ready to use.  

Chocolate, spread thinly

  • Forming: To form the slices, use a spatula to spread chocolate thinly across the silicone mat and then create rectangular segments using a dull knife. Allow the chocolate to cool thoroughly and peel off the mat. You're ready for a saturday morning delight with the kids!


Thin chocolate layer, segmented into rectangles

What else do Danes do with Chocolate?

Canadian flødeboller
While chocolate on your open-faced sandwich may seem like a revelation, Denmark has another interesting chocolate specialty - called flødeboller. These delights are basically cookie topped with marshmallow and then dipped in chocolate. If you like the sound of this, you can find an approximation, albeit a poor one, in Canadian supermarkets - they are called Whippets cookies. As a child visiting Denmark, I always had an amazing time - mainly because my father and I would make a point of visiting one of the many old-time candy shops located on Strøget (the central Copenhagen walking street) to gorge on flødeboller in their many different  shapes and sizes - some plain milk chocolate, some coated in dark chocolate, some stuffed with marzipan, and some adorned with shredded coconut - so many options - as a kid, it boggles the mind. Just to keep you guessing, I have not included a photo, but you can check here for a Danish website with really authentic looking flødeboller. This is not my speciality, so I am leaving these to the experts. Enjoy!


Dyrlægens Natmad - takes time, but it's worth it!
Dyrlægens Natmad, along with Sol Over Gudhjem, is one of the very few named Danish open-faced sandwiches. The name translates to Veterinarian’s Night Snack, which always struck me as odd as a child, since the sandwich contains a lot of meat and I assumed that the name was implying that the veterinarian was eating his former patients!

The sandwich is sinfully delicious, made from paté, rich meat aspic (called sky in Danish), and a kind of corned beef (called saltkød - I make it from silverside veal). Frankly, because of the meaty ingredients, I always thought it would have made more sense to refer to the sandwich as the Vegetarian’s Nightmare. Anyway, it’s eaten on buttered Danish rye bread, or better yet, rendered bacon fat, and it’s super delicious - like nothing else in this world. Trust me.   

Grocery shopping in Denmark is different! (Images from Super Best and Nemlig)
If you live in Denmark, the ingredients for this sandwich are readily available in the supermarket, but if you live in North America, like I do, you’ll just have to make the ingredients yourself. And this will require some planning and coordination, since pretty much each and every darn element of this sandwich takes time and plenty of manual labour. 

Tycho Brahe and his nose...
As such, the Danish Degree of Difficulty for Dyrlægens Natmad is a Tycho Brahe Hard – not impossibly hard, just a lot of painstakingly detailed work – much like the accurate astronomical measurements carried about throughout the lifetime of Tycho Brahe, the notable Danish Astronomer of the late 1500s. 


The observations and precision work carried out by Brahe (1546-1601) ultimately contributed to Kepler’s Laws of planetary motion – one of the most revolutionary scientific discoveries of the time. You may not have known this, but Johannes Kepler was, in fact, assistant to Tycho Brahe, and thus had access to all of Brahe's astronomical measurements. Kepler used this data in figuring our the planetary motion, but who cares about Kepler? Let's just say that, thanks to Tycho Brahe, we know that our solar system is more than a giant celestial mobile hanging from some heavenly bedroom ceiling.

So what does this have to do with Smørrebrød? Nothing. But it is interesting and could – if greatly embellished with loads of artist license and maybe even a few outright falsehoods - allow me to concoct a plausible reason for how this week’s open-faced sandwich came to be tagged with an “official” name. So here is my version of the story...

The Round Tower
In the early 1600s, astronomy was really hot, thanks in part to the earlier work of Tycho Brahe. Apparently a sucker for a good fad, King Christian IV (1577-1648) commissioned the building of an astronomical observatory called RundtÃ¥rnen (or the Round Tower, which today is one of Copenhagen's most famous landmarks). Offering wonderfully unobstructed views over Copenhagen, the Round Tower was built with a 210 m long spiral ramp which climbed up the inside of the tour towards the observatory. This ramp was built as it was the King’s wish to be transported to the top of the Round Tower by horse carriage. It’s good to be the king! (By the way, if you want to learn more about King Christian IV, check out his Facebook page here)

The King’s horses were kept in a stable at the top of the Round Tower. Next to this stable there lived a veterinarian whose job it was to tend to the horses’ medical needs – should there be any. It was a lonely job, as royal visits to the observatory were few and far between. Anyway, rumour has it that the veterinarian often enjoyed his midnight snack by himself while looking out over the city of Copenhagen. His favourite midnight snack? You got it – paté, sky, saltkød on buttered rugbrød.
 Anyway, you get the picture...

The Round Tower's 210m spiral ramp - perfect for horses carrying kings
Actually, there does seem to be a generally accepted reason for the sandwich’s name – if you speak Danish, or know how to use Google Translate, you can read it here... ). Personally, I like my version of the “truth” better.


Copenhagen as viewed from the Round Tower
One last thing about Tycho Brahe from the “strange but true” file. Apparently, he lost his nose in a sword duel (It's all fun and games until somebody loses a nose!). In order to cover his injury, he wore a fake nose made of silver and gold making him the first bling’ed out astronomer. Pretty cool, eh? If you want to read more about Tycho Brahe’s nose, check this out... 

Making Dyrlægens Natmad


Step-by-step...
Now lets get down to the business of making this week's open-faced sandwich. First of all, you need dense Danish rye bread. You can find the recipe here.


Next, you want to cover it with either butter or rendered bacon fat (I like my bacon fat cooked with a bit of apple and thyme). 


Then, liberally spread a few tablespoons of Danish leverpostej (liver paté). You can find the leverpostej recipe here. If you were to stop at this point, you'd have a very tasty sandwich. But we're far from finished. 


Next comes a few thin slices of saltkød. Saltkød is basically like corned beef. Made from veal, you should use the silverside cut, which comes from the cattle hindquarter and explains the meat's characteristic multi-colour shimmer. 


Sliced saltkød - tender and meaty!


If you want to make saltkød, you first salt the meat to cure it, then you cook it in a flavoured broth to spice it. It takes about a day and a half to make - but most of the time is due to the curing process. You'll probably need to explain exactly what cut of meat you need to a butcher. Use this web page as a guide. It worked for me. The recipe for saltkød is below.


Sky - like precious gems in a spoon!

Still building vertically, you top the other meats with a few shiny cubes of sky, basically meat aspic. Making aspic from scratch (in other words without the addition of gelatine) takes more than a little while, in fact it takes an eternity. It involves slowly simmering meat, bones, and vegetables in water until it's all reduced to a very small amount of deeply brown liquid. You then strain it all, throw away the solid parts, and chill the rest until the aspic is set. What's that? Your aspic's not firm enough? You can always reheat it and continue the reducing process if you find that the aspic is not "tight" enough. In all, the entire process can take anywhere from 5-7 hours. So patience is needed - but homemade aspic tastes so good - the meaty richness just melts in your mouth and it adds so much character to Dyrlægens Natmad. You can find a recipe for sky at the bottom of this post.


Dyrlægens Natmad:
Wash it down with a beer!
Finally, crown the majestic smørrebrød by adding a few rings of crunchy red onions plus a small bunch of cress of radish sprouts. Then you are finally ready to savour the most Danish of open-faced sandwiches.


About Saltkød

Normally when making cured meats like saltkød or corned beef, the meat is first brined in a spiced salt solution for at least a week prior to cooking. I find that you can expedite the process by simply giving the meat a good salt rub the day before you are planning on cooking it - this helps to draw out the moisture and salts the meat. It may not be exactly the same, but since I'm not planning on bringing my saltkød on any month-long seafaring expeditions, I'm less concerned with the preservation properties, and more into how it tastes. This recipe works.     

Salted silverside veal shank
Ingredients for Saltkød
  • 1 kg silverside veal shank (boned)
  • 3 tbsp coarse salt
  • 1 tbsp sugar
  • 1 carrot, peeled and chopped
  • 1 parsnip, peeled and chopped
  • 1/2 small celery root, peeled and chopped
  • 1 onion, peeled and chopped
  • 3 cloves garlic
  • 1/4 tsp whole all-spice
  • 1/4 tsp whole peppercorn
  • 3 bay leaves
  • 1 bunch parley
  • 2 sprigs of thyme

Cooking saltkød - Get rid of the scum!
Instructions for making saltkød
  1. Combine the salt and sugar, and rub it in to the veal, coating everywhere. Place the veal in a plastic bag and let sit in refrigerator for 24 hours.
  2. Place the cured veal in large casserole.
  3. Add the vegetables and spices and cover with water.
  4. Heat until boiling and then reduce heat and simmer for about 45 minutes. Periodically, skim the foam that forms on top. 
  5. Remove from heat, and allow the meat to cool thoroughly sitting in the broth.
  6. Slice thinly and enjoy with Dyrlaegens Natmad!
About Sky


Instructions for making sky

1) Begin by placing the bones, meat and onion on a baking sheet, and then broil it under a hot broiler for about 5 minutes per side. This browns the meat and ultimately adds a richer flavour to the aspic.

Roasted meat and bones gives flavour and body!
2) Add the oil to a large pot and quickly sweat the vegetables over medium-high heat.

3) Add the wine, tomato paste and spices and simmer a few minutes.

4) Add the meat, bones, and onion to the pot and cover with water (about 3 litres).

Simmer for hours - you'll need patience.
5) Heat until just boiling and then reduce the heat and simmer. Make sure you do not disturb the ingredients in the pot for about 5 hours. You will need to periodically skim the foam off the top of the broth (this foam, if not removed, will end up affecting the taste and appearance of your stock).

6) When the liquid is sufficiently reduced, strain in a fine mesh sieve and discard meat and vegetables.

7) You should have 500ml or less. If you don't, return the liquid to a small pot and keep reducing slowly.

8) Once you've finished reducing the stock, add salt to taste, pour the liquid into a small clean container and allow it to cool completely in the refrigerator until the aspic is firmly set.

9) Enjoy atop a Dyrlægens Natmad or with a sharp Danish cheese like Samsø. Don't forget the fork and knife!


    Ingredients
    Sky is meat aspic. It takes time to make. If you want to cheat and make something quickly, just add some gelatine to beef broth. But don't tell your guests. They won't be excited by your ingenuity.

    Ingredients for sky
    • 1 kg beef bones
    • 1 pork shank
    • 300g beef cubes
    • 1 carrot, peeled and chopped
    • 1 parsnip, peeled and chopped
    • 1 onion
    • 1/2 bunch of parsley
    • 1 tbsp tomato paste
    • 1/2 cup of red wine
    • a bit of olive oil
    • Water
    • Salt to taste
    
    Kartoffelmad - simply beautiful!
    Sometimes you want to eat something that takes a ridiculously long time to make and some times you don't. And if you're in the mood for simple, then look no further - kartoffelmad is for you! One of the simplest - yet most satisfying smørrebrød - it is made from buttered Danish rye bread, slices of boiled potato, mayonnaise, chives, and a bit of salt and pepper. As with many other delicious smørrebrød, kartoffelmad is especially good at lunchtime, washed down with a nice cold øl (beer).

    Kartoffel means potato and mad means food, so I very astutely refer to this smørrebrød as potatofood. I like the way the name rolls off the tip of my tongue. It's funny, the name of this Danish open-faced sandwich reminds me of a saying, a saying that states that that people who speak Danish sound like they are speaking with a potato in their mouth. (From eating kartoffelmad?)

    Danish: Hard to learn even without a potato in your mouth
    As a language, Danish is really complicated for so many reasons - the tongue twisting pronunciations, extra genders, funny letters in the alphabet, articles that come after the noun, and the ever popular compound words - these are my top reasons for struggling with this Nordic tongue. Compound words like Beskæftigelsesministeriet (Ministry of Education) are probably the best example of how complex things can get - I can't even tell where one part of the word ends and another one starts and good luck if you want to look this up in a dictionary! It makes the learning process very tricky, indeed. Luckily, kartoffelmad is a nice simple example of a compound word:
    kartoffel + mad = potato + food = deeeee-licious!

    Ok, here is the thing. Kartoffelmad is a snap to make - even small children can do it (though if there are any children under the age of 12 planning on following this recipe, please ask your parents for help boiling the potatoes!), but the success of the final product is highly dependent on the quality of the ingredients that go into making it. You must not take shortcuts - it's not worth it. Eat something else instead. Life is too short to eat bland, starchy potatoes on store-bought German pumpernickel.

    So how do you do it right? Let's start with the bread. Only real Danish rye bread will do this sandwich justice. So much is riding on it!

    Next comes the potatoes. Do yourself a favour and ditch the gnarly old baking potatoes. Instead, pick new potatoes or fingerlings - both are delicious. They should be boiled slowly in lightly salted water and allowed to cool thoroughly before eating. Peeling is optional. Fork and knife are not.

    Left: Fingerling potatoes. Yum!
    Center: New potatoes. Also yum!
    Right: Gnarly old, warty potatoes. Avoid! 
    Finally, the mayonnaise. Of course, you can use the Hellman's store bought variety, but that would be no fun. Why not make the mayonnaise yourself? It'll taste so much better and it raises the Danish Degree of Difficulty to just slightly about Very Easy! There is a recipe below for making your own mayonnaise.

    Oh, and chives. Lots of freshly chopped chives. Or, in a pinch, use green onions.

    Royal Copenhagen Porcelain,
    for when your smørrebrød deserves only the best
    Finally, if you really want to spare no expense on this sandwich, serve it on a real blue-fluted Royal Copenhagen porcelain plate. You've probably noticed these plates in a number of my other posts. Let me tell you a bit about them...

    Royal Copenhagen is the purveyor of porcelain to Her Majesty the Queen of Denmark (Queen Magrethe II). The company was founded in 1775, which apparently makes Royal Copenhagen one of the world’s oldest companies. It's main flagship store is located in the heart of Copenhagen (right next to Georg Jensen - see post from a few weeks ago). If you are interested in the Danish Royal Family, you can learn more about them here.

    
    Royal Copenhagen
    head office
    
    Royal Copenhagen is crazily expensive, very beautiful, and is the standard in elegant Danish tableware. If you are dying to procure some RC porcelain for your own sandwich creations, you can buy it online here. In Denmark, it is not uncommon for families to hand down their dinnerware from one generation to the next (that is exactly how I got some of it).


    Making Mayonnaise

    Here is a recipe for making your own mayonnaise. My way requires a hand blender, but in a pinch, you can make it by hand but you'll have to look up the instructions somewhere else (like Epicurious.com).

    Ingredients:

    • 250 ml Sunflower oil
    • 2 egg yolks
    • 1 tbsp Dijon mustard
    • 2 tbsp lemon juice
    • A pinch of salt

    
    Homemade Mayonnaise
    
    Instructions

    1. Place all the ingredients together into a wide-mouthed 1L Mason jar (or other suitably large receptacle).
    2. Insert the hand blender into the jar all the way to the bottom, then turn it on, and slowly lift the blender up from the bottom of the jar. As the blender rises, the mayonnaise begins to emulsify.
    3. Keep lifting the hand blender all the way up, until the mayonnaise is thick all the way through. You may need to give the mayonnaise a final few stirs with a spoon to complete the emulsification.
    4. If the mayonnaise doesn't come together, try adding a few more drops of lemon juice (or vinegar) and try again with the hand blender.  
    Note on home-made mayonnaise: When you make it yourself, it's a real delight the eat, but you can't keep it in the refrigerator forever While spoiling times may vary, I'd recommend not keeping the mayonnaise for more than a week. So don't make more than a cup or so at a time or it'll just end up going to waste.


    Pork sausage with cucumber salad (Medisterpølse med agurkersalat)
    Danish pork sausages are traditional and simple to make, at least as far as sausages go. They are great on their own as a main course, and the leftovers make excellent smørrebrød when sliced up and placed on top of buttered Danish rye bread. While there are a number of pickled condiments that compliment medisterpølse, I prefer the fresh and tangy taste of Danish cucumber salad (agurkesalat) to go with lightly spiced pork sausages. And to wash it down? Cold beer. "Skål!"

    Lightly Spiced Danish Pork Sausage - Medisterpølse
    Agurkesalat
    Actually, agurkesalad is a very common Danish side-dish, one that can easily be purchased prepared in any Danish grocery store. It is easy to make and requires only a few ingredients, but requires a bit of time, as you must first salt sliced cucumber to extract the water contained in the gourd-like fruit. Seedless English cucumbers are the best for making agurkesalat.

    If you've ever been to Denmark, you probably noticed that there are many fast food-style hotdog vendors around the city with their own small stands. These pølsevogn, as they are called, sell an assortment of different ready-to-eat sausages - from the disgustingly red rødpølse to some slightly more natural looking fried offerings such as ristet pølse. Keep in mind that these hot dogs are essentially Danish fast food, and while they are occasionally served with agurkesalat, they have nothing in common with the delicious, home-made medisterpølse described in this blog post.

    Left: Polsevøgn in Copenhagen
    Centre: Mysteriously red rødpølse
    Right: Ristet pølse with fried onions and agurkesalat
    In order to make Danish pork sausage smørrebrød, you will need:

    • 1 slice of buttered Danish rye bread
    • 1 medisterpølse, cooled (recipe below)
    • 1-2 tbsp agurkesalat (recipe below)
    • Dijon mustard to taste 

    I love writing this blog, as it gives me an excuse to spend time every weekend thinking about my favorite topic - food! However, no blog post would be complete without a completely gratuitous digression on topics seemingly unrelated to eating - this week that topic is "Holger Danske."

    Statue of legendary Danish hero
    Holger Danske
    sleeping in the basement of
    Kronborg Castle
    Holger Danske is a legendary Danish hero who fought as a mercenary along-side Charlemagne in the 8th century. The legend states that in his entire, highly decorate career as a mercenary, he never once lost a battle, but after years of fighting abroad he grew homesick (craving smørrebrød?). So, he did what all homesick Danish mercenaries would do when finished fighting in the South of France during the Dark Ages - he walked back to Denmark.

    He walked all the way to the town of Helsingør, home to Castle Kronborg, where he sat down, exhausted, and immediately fell asleep. And he still sleeps there today in the basement of Kronborg. According to legend, however, Holger Danske will awaken if an enemy comes along to threaten Danish sovereignty. So it may come as no surprise that, during the Second World War when Denmark was occupied by the Nazis, the Danish Resistance fighters named themselves Holger Danske.

    So what does this have to do with smørrebrød? For most Danes, absolutely nothing. But for me, as a child growing up in Canada, my father would tell me the story of the Holger Danske and warned me that if I ever made smørrebrød that did not adhere to the strict Danish manner, Holger Danske would awaken from his deep slumber - somehow walk to Canada - and do unspeakably terrifying Viking-things to me as punishment for threatening Danish tradition.

    As I mentioned, Holger Danske sleeps in the basement of Kronborg castle in Helsingør (Elsinore). This very same castle is famous for another reason. According to William Shakespeare, it is none other than Elsinore Castle, former home of the Prince of Denmark, the tragic figure Hamlet. (Interested in a transcript of Shakespeare's Hamlet?)

    Kronborg Castle - former home of Hamlet, King of Denmark -
    current home of Holger Danske
    And what does this have to do with smørrebrød? Again, nothing, unless, like me, you've initiated countless numbers of non-Danes to the traditions of Danish open-faced sandwiches. Admittedly, Denmark is a small country, and most North Americans have limited knowledge about the tiny Kingdom. Yet everybody seems to know the Little Mermaid and Hamlet. And inevitably, when mentioning Hamlet, they cite the famous line by Marcellus: "Something is rotten in the State of Denmark" followed by a cleverly improvised "let's hope it isn't the herring we're about to eat!" 

    Anyway, let's get back to our medisterpølse. Here's what you need to know.

    First of all, the Danish Degree of Difficulty is a Holger Danske Hard - mainly because of the time it takes and the special sausage-making equipment you will need. Also, when it comes to making sausage, I highly recommend you grow a third arm, or better yet, enlist the help of a friend.

    Well-marbled pork shoulder
    For really great sausage, the key is really great pork. The question is what cut is the best. While I have a fair amount of sausage making experience, I decided to enquire with my friends at Pork Futures - these guys are the experts in making all manner of delicious pork sausages using the freshest organic ingredients. They recommended well-marbled pork shoulder with the option of adding extra back fat depending on how "juicy" you like your sausages. Also, be sure to keep everything as cold as possible. This minimizes the risk of unwanted bacteria forming and keeps the fat from melting into the meat.

    Ingredients for Making Danish Pork Sausage

    To make medisterpølse, you will need:

    • about 2 kg refrigerated pork shoulder (plus the option of additional back fat)
    • 1 large white onion
    • 500 ml beef broth (preferably homemade), cooled
    • 1 1/2 tbsp salt
    • 1 tsp ground all-spice
    • 1 1/2 tbsp ground black pepper
    • 1/2 tsp each ground clove, nutmeg, and ginger
    • at least 3 meters of pork casing (available at good butchers)
    • For cooking - 2 bay leaves + 2 tbsp butter
    1) Slice about 2 kilos of pork shoulder into cubes. Then run the meat through a meat grinder using the fine setting. If you are using extra fat, grind it, too).

    Grind the meat
    2) Chop the onion, and run it through the meat grinder. Then thoroughly mix together the meat, onion, spices, and broth using your hands. Fry up a small amount of the mixture to taste for seasoning. If needed, adjust seasoning to taste (for instance, add a bit more salt).

    Combine the ingredients
    4) Add a medium-sized sausage attachment to your meat grinder and load a couple of meters of casings onto the sausage stuffer (spigot).

    Sausage casings are loaded
    up and ready to go


    5) Fill the casing with the sausage stuffing. With medisterpølse, you do not create links. Instead, you create long coils about one meter long each that you cook all at once.

    Coiled medisterpølse, ready for cooking. 
    6) Place coil in a large frying pan, cover with water, add 2 bay leaves, and bring to a boil. Reduce heat to simmer for about 15 minutes.

    Simmering sausage
    7) Drain cooking liquid and remove sausages temporarily to a plate. Cut the sausages into pieces about 30 cm long. Meanwhile, return frying pan to stove set at medium-high heat. Melt 2 tbsp butter and fry entire coil of sausages until golden brown all over.

    Yum!


    Making Agurkesalat

    Now for the agurkesalat - everybody's favourite Danish side-dish! Why buy it at the store when you can make it yourself!

    Here is what you need to know:

    Ingredients for Agurkesalat

    • 1 English cucumber, washed
    • 1 tbsp coarse salt
    • 250 ml white vinegar
    • 3 tbsp chopped dill
    • Freshly ground black pepper

    Instructions for Making Agurkesalat


    1) Using a sharp knife, thinly slice the entire cucumber.

    2) Place the sliced cucumber in a bowl and toss with the coarse salt. The salt will serve to pull out the liquid from the cucumber flesh.

    Toss cucumber with coarse salt
    3) Put a small plate on top of the cucumbers in the bowl and weigh it down with a jar or other weighted object.
    Cucumbers weighted down
    4) After about 2 hours, you will notice that the cucumber slices are basically sitting in a bowl of salty water. Drain the salty water, squeezing out as much excess liquid as possible (without crushing the cucumber).

    Cucumbers sitting in their brine
    5) Pour in the vinegar and stir in the chopped dill. Allow the mixture to sit in the refrigerator for a couple of hours before using to allow the flavours to blend.